
When I bought my sewing machine, it came with two free sewing lessons. They are the only machine sewing lessons I’ve had since half way through my first year in high school, when home economics and tech studies diverged and I was in the first cohort of girls allowed to do tech studies. At that point home economics had stretched to making a gingham pillowcase and learning how to van dyke an orange. It wasn’t looking promising to me. So I learned how to use a band saw, and how to solder and weld instead. And how to stare down a queue of boys who all want to see you fail on a big piece of machinery!
I remember some of the demonstrations in those sewing lessons. The teacher had extremely firm views and a level of competence and confidence my mother never had (I am sure she had a lot more training than my mother and she definitely had a much better sewing machine). I saw feet demonstrated and techniques shown that I had never imagined possible. Mostly because they were not possible on my previous and only other machine. Well, this one came with a roll hemming foot that I could not imagine having a use for.
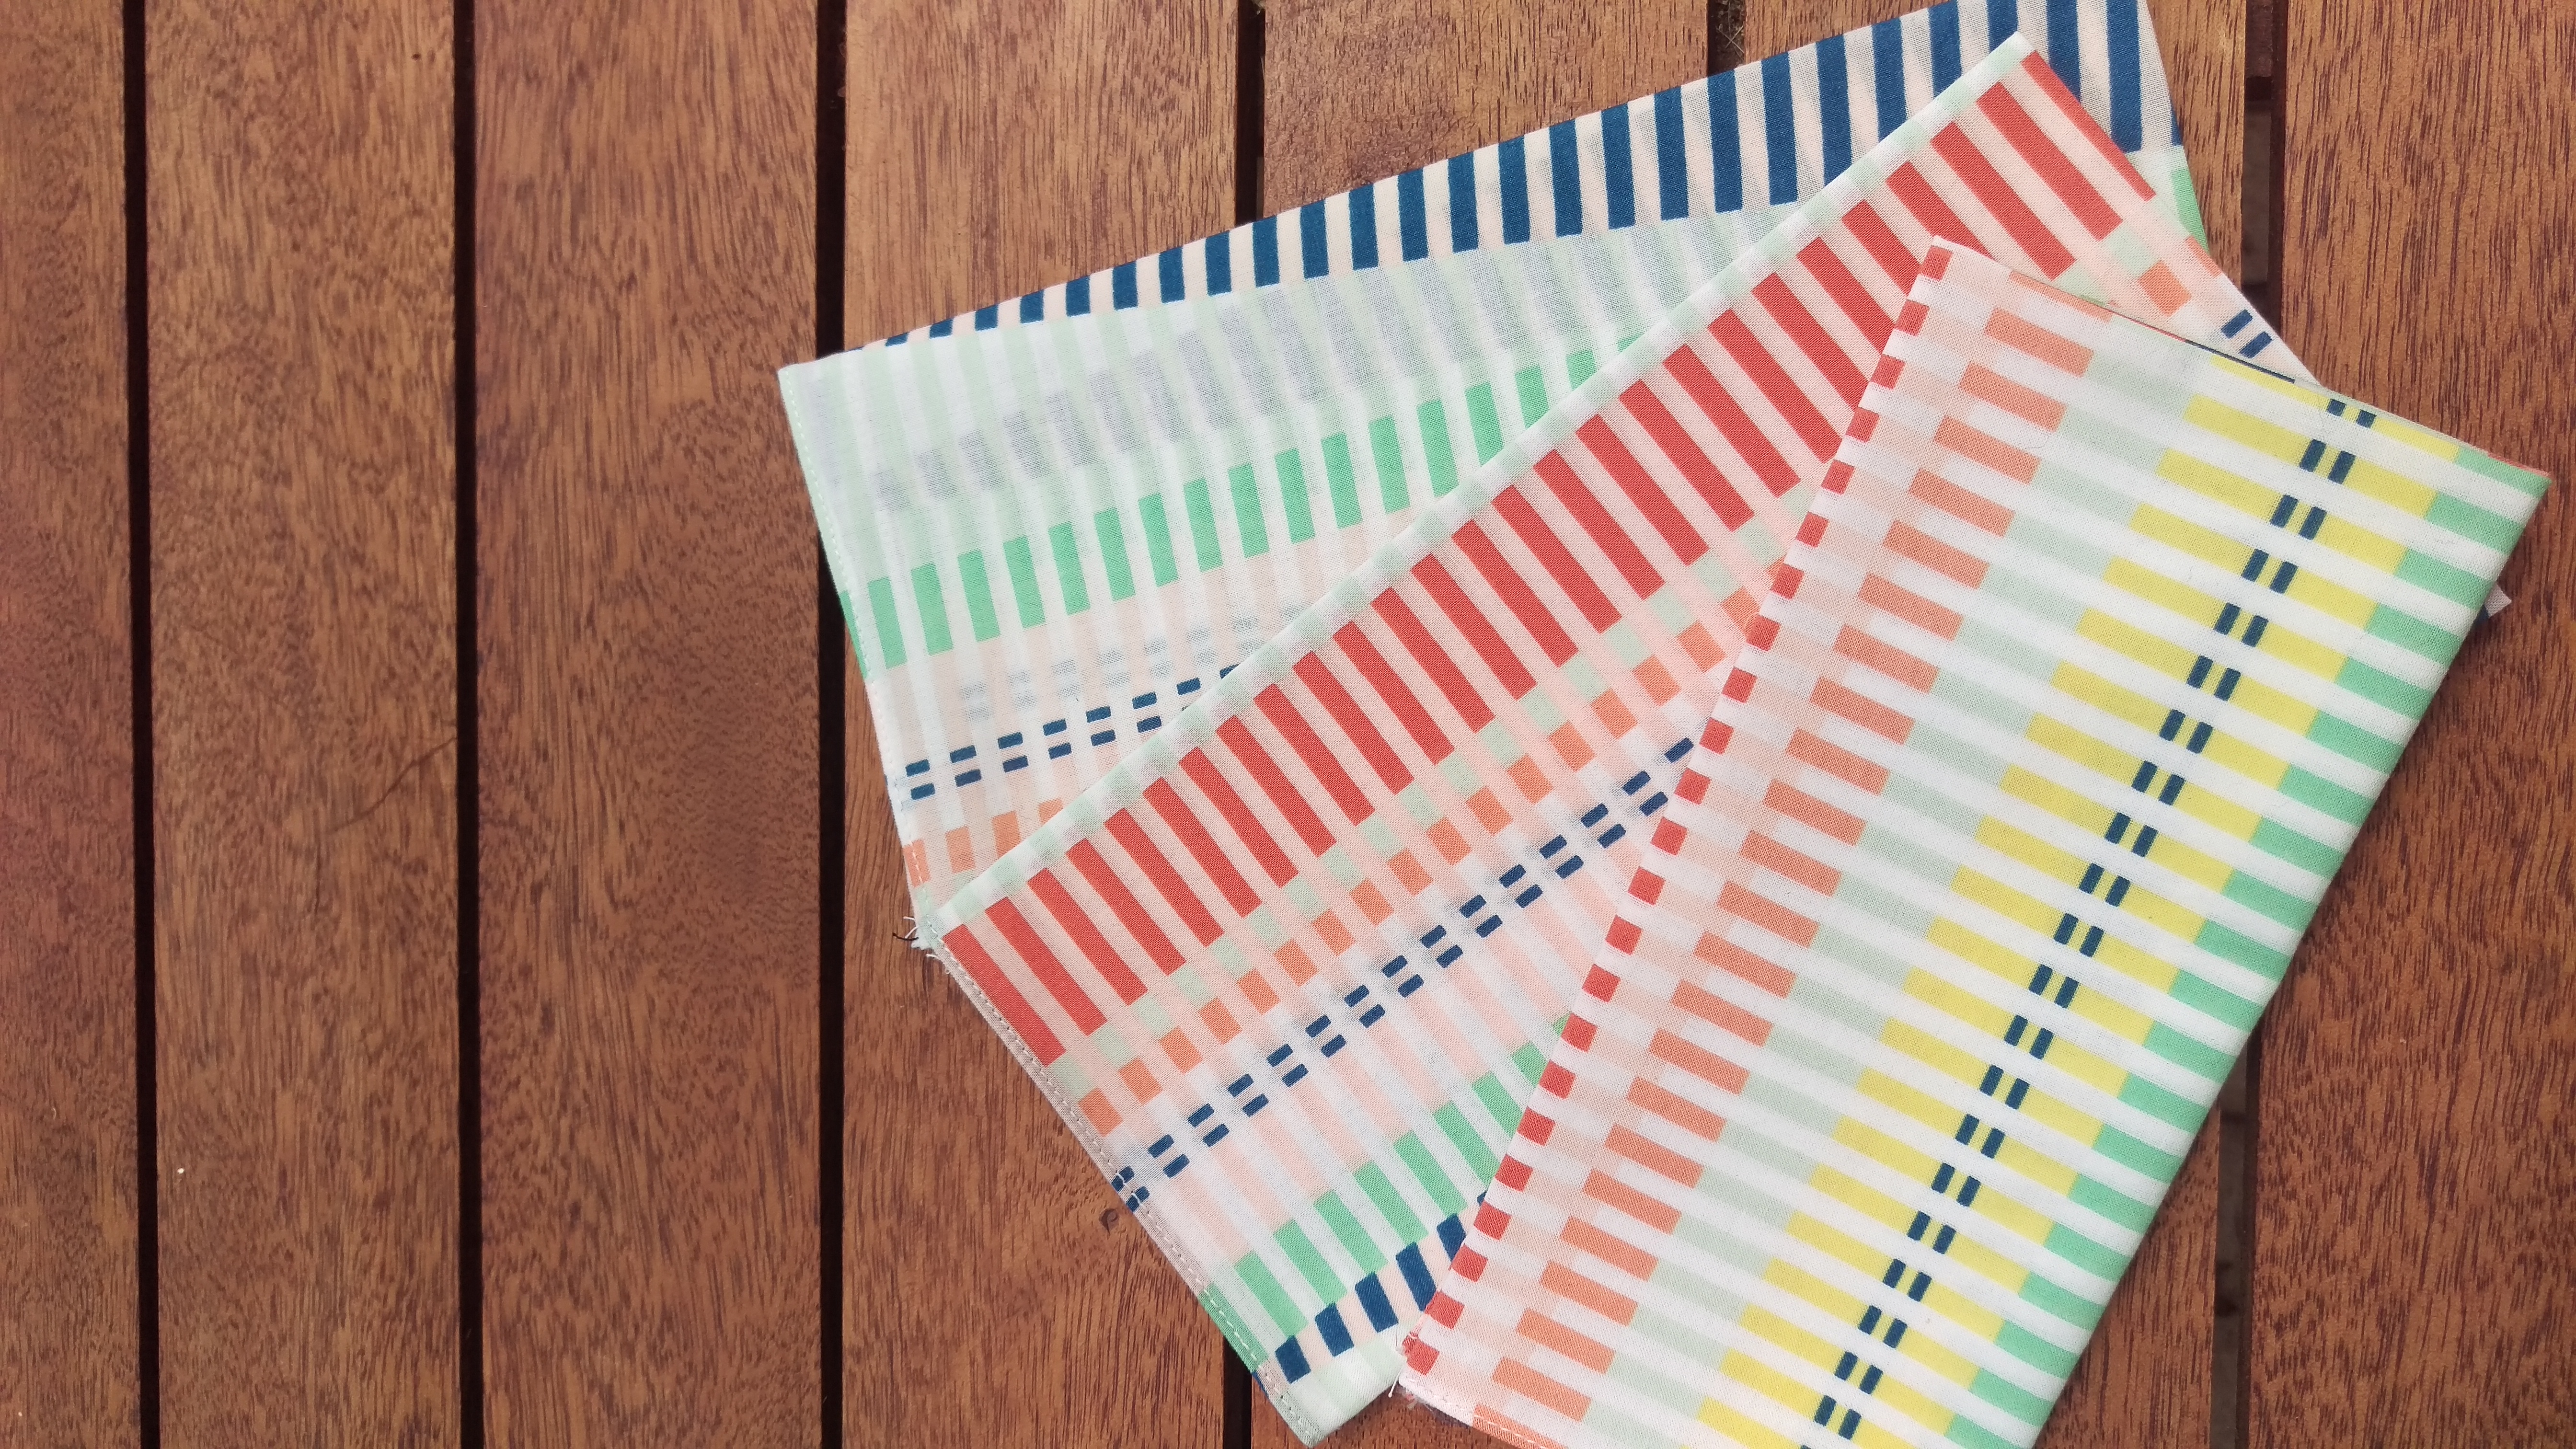
The use appeared a while back when I decided that making handkerchiefs and napkins might be a thing I could do, and when I was looking at an entire bed sheet as the fabric to be converted to handkerchiefs, I decided I wouldn’t be doing it by hand like my grandmother taught me. She must have been so delighted by the hours of silence when she gave me a square of fabric to hem nicely into a hanky! I don’t think my sisters were quite as excited by the task as I was. Well, since that bed sheet gave up the ghost as a sheet, it has been hemmed, dyed in woad and indigo and euc leaves, and shared widely. Over the holidays I went to a big chain fabric store and failed to leave without more fabric–two 40cm strips of fine cotton came home with me and you can see them above, now turned into hankies. It had me thinking that having a whole sheet to practise on had really built my confidence.
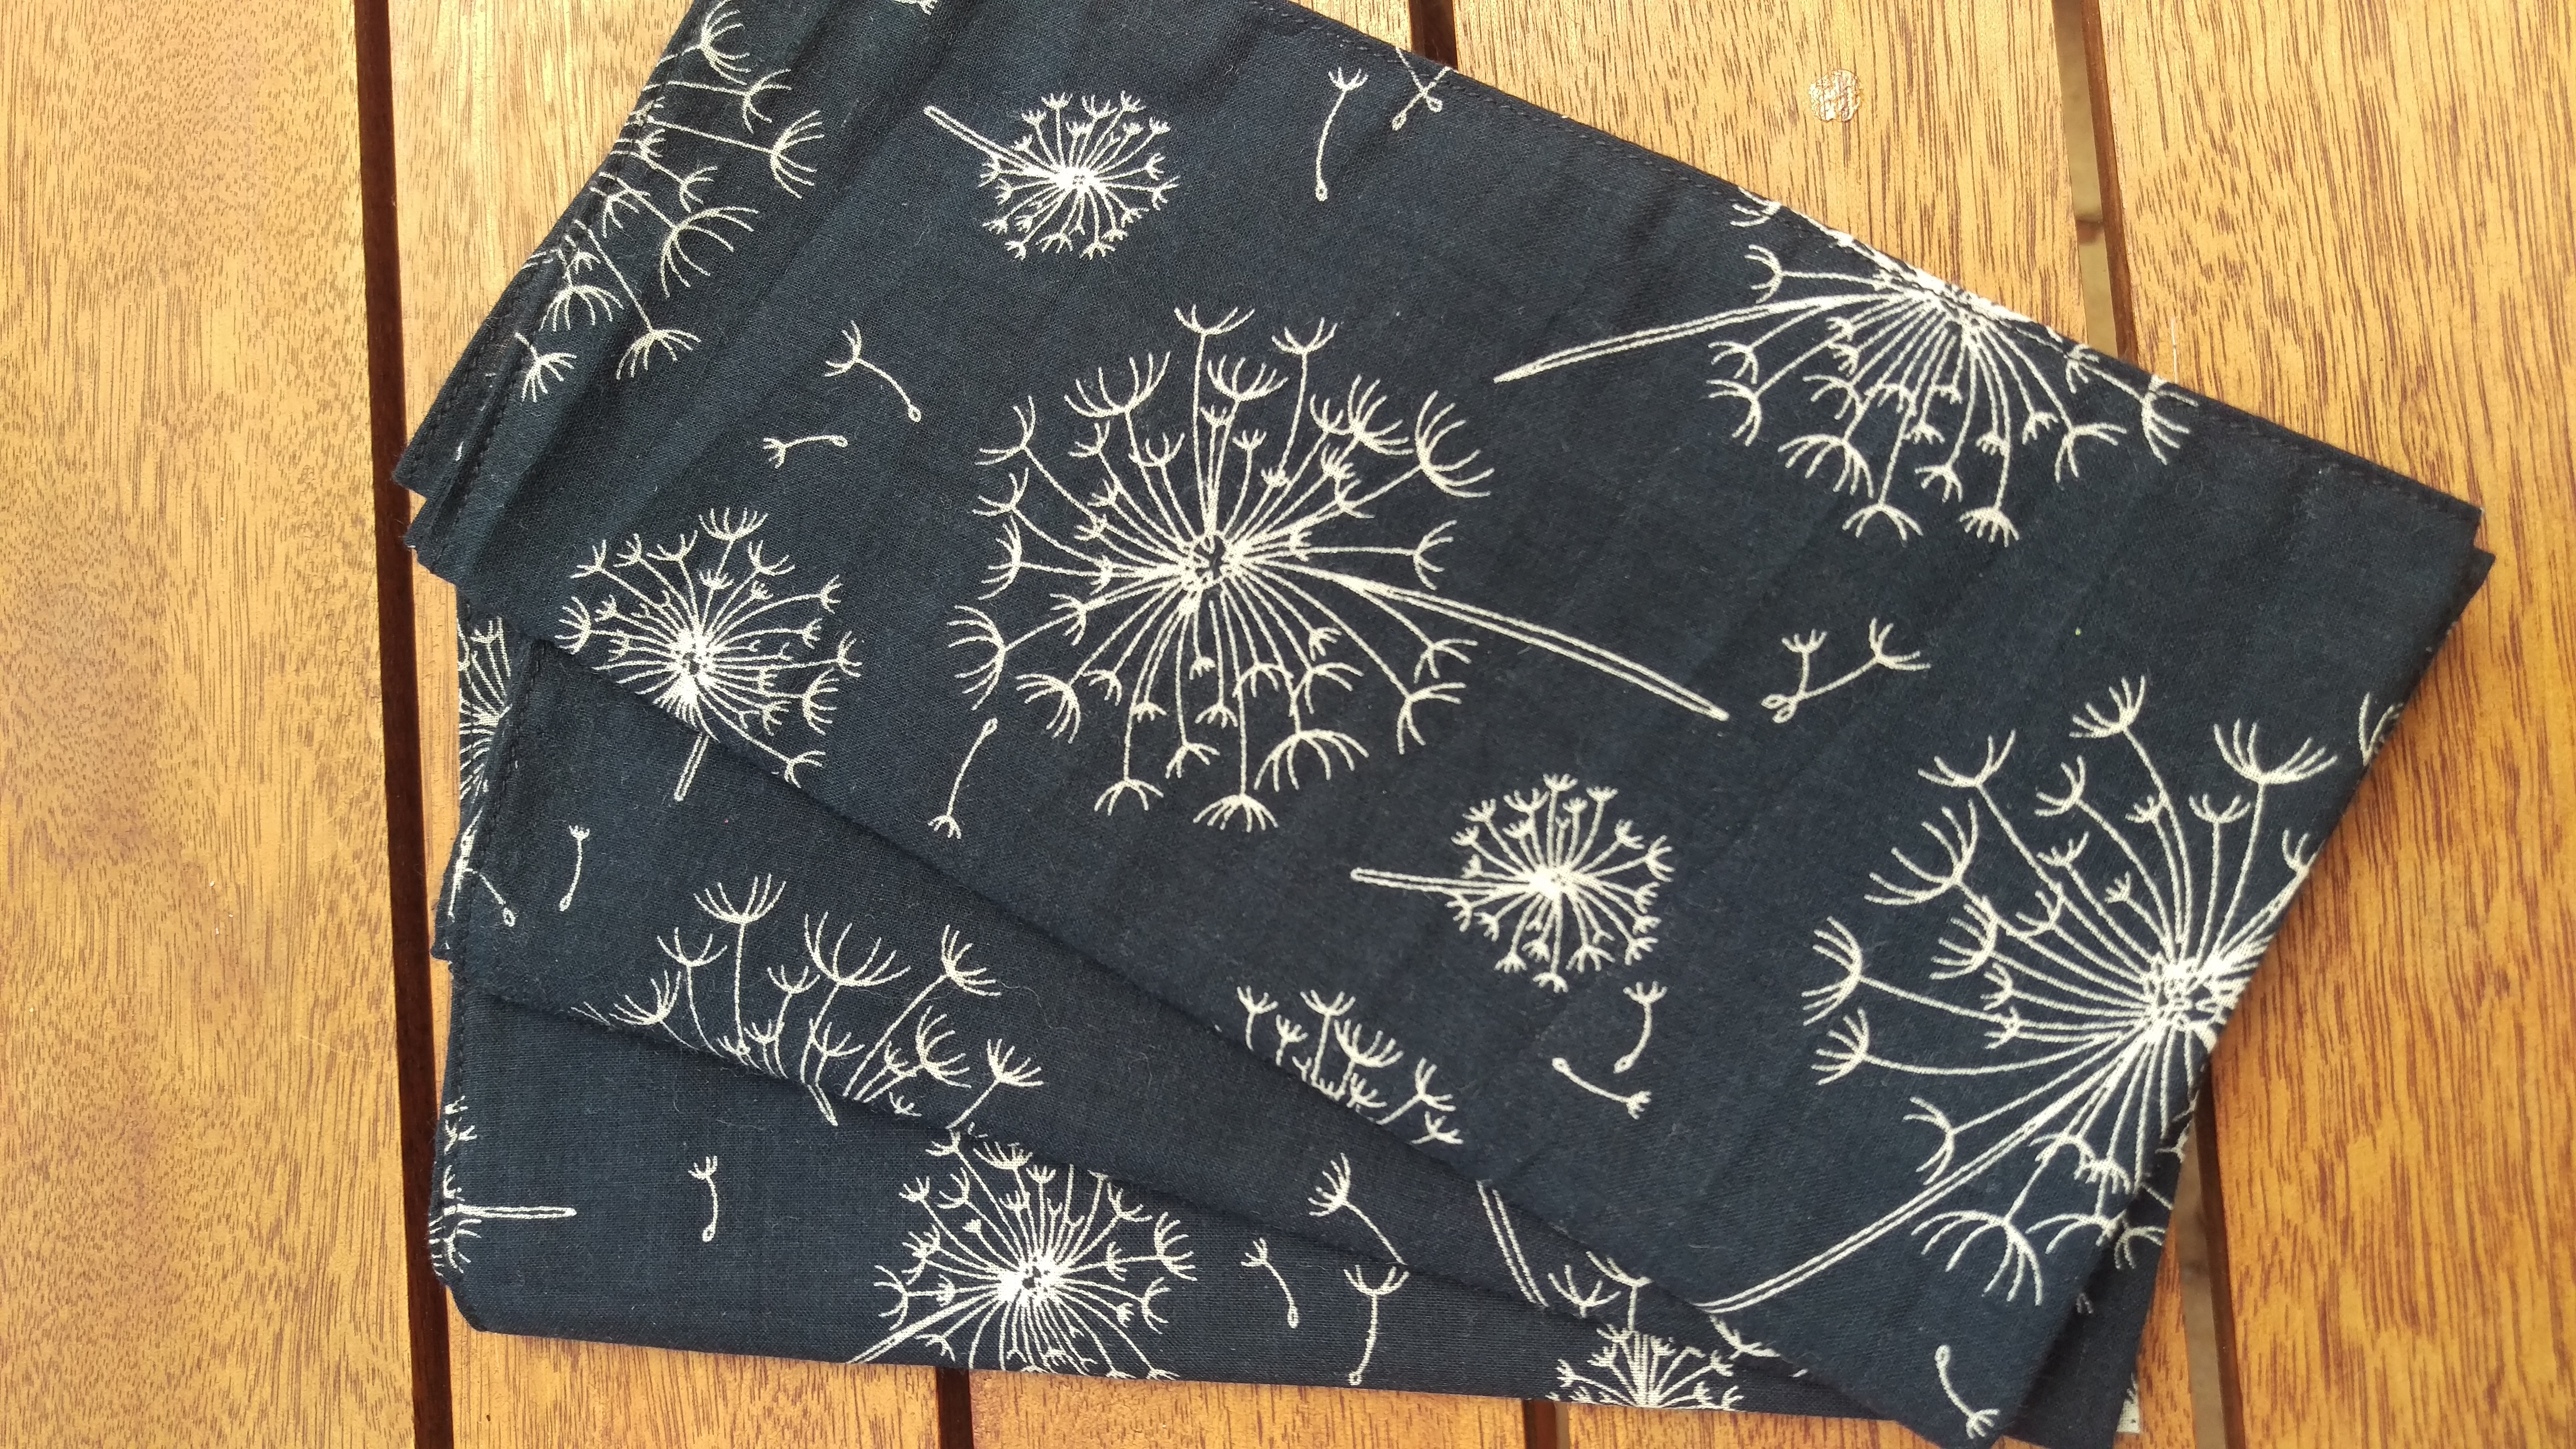
Now, another sheet has called it a day. You know when fabric parts company with itself so comprehensively that no amount of sewing edges together will sort it out, and the size of the patch needed to hold that fitted sheet together will be almost as big as the mattress top? Soft, delicious, well washed cotton. Ready for transformation. If you would like to make friends with a roll hemming foot (and you can sometimes buy they separately if your machine didn’t come equipped with one)… here are my tips.
Step 1. Read the manual. Maybe it’s just me, but on my machine the process is not intuitive and the instructions are a big help. I read them four times before finally following them correctly. I think I have mentioned the role of user error in my life a few times on this blog! If you don’t have a manual, it’s worth searching online, even for old machines.
Step 2. Prepare to be patient with yourself and the machine. Music? Silence? Stretch? Cup of tea?
Step 3. Make sure you have matching thread in the bobbin and in the upper thread. Or maybe you don’t commit such crimes against sewing. Clean and oil the bobbin race while you’re at it.

Step 4. Make sure you have an appropriate needle in place for fine fabric and that it is sharp. Don’t be using one that has already had a lot of use, or one made for stretch fabrics, because it will push your fabric into the down-below in a most frustrating manner when you try to take your first stitches.
Step 5. Find a scrap of fabric, preferably an offcut from your intended fabric, and fold it so that it has as many layers as your hem will have and is about the same thickness. Run a line of stitching across it until you get to the edge. Leave it in position. This will let you do two things: make sure the foot is level as you begin if you are stitching over a hemmed edge, and make sure you have something to hold on to if you need to maneuver your napkin fabric into position.
Step 6. Plan your sewing. It might just be me, but I find beginning the hem the hardest part. If I can hem a long piece of fabric all at once, I will always choose this strategy, and then cut it into napkins and have two shorter hems to manage, not four.

Step 7. Having prepared your fabric as the manual dictates, and ironed the edge you will be hemming nice and smooth, reduce your stitch length to very small (1.5mm works for me). Work a couple of stitches. If your fabric descends into the machine, raise the needle and the foot, and gently pull everything taut, with one hand on your napkin-in-construction and one on your scrap fabric. Check everything is in the position you want it in, lower the foot and begin to sew. If at first you turn out to be sewing in one spot, stop again. Raise needle and foot. Pull taut again, and move the fabric fractionally. Do not pull while you are stitching. If you don’t know what happens when you do this, I salute your good habits and patience. Take another stitch, until the feed dogs engage and the machine is moving the fabric. Then you can get your rolled hem going smoothly, and you’re off! Finish with some more tiny stitches, because back stitching is unlikely to work out.
Step 8. Once you have one napkin or length of fabric hemmed, leave it there and use to to maneuver the next piece you need to hem, much as you used the scrap fabric the first time.
Step 9. Once you begin to need to create a hem over a hemmed edge, clip the hemmed edge on the diagonal at the beginning and end of your hem ever so slightly. You will have less of a hump at the start (which will make getting your stitching started simpler) and it will reduce the chance that your fabric gets stuck in the roll hemmer at the end.

Step 10. Practice, practice, practice! And pretty soon, you will have a stack of napkins, a stack of hankies, some cotton string from torn off hems, and a few bits of rag/interfacing/foundation for patchwork!


Ha, I recently got a new sewing machine and also tried the roll hemming foot. And I thought I sure must be the only one who didn’t get the instructions right away. So glad to hear I am not alone. I’ve been through all those problems you describe. Should have waited to weeks and maybe saved myself some nerves 🙂 But anyway it’s working now for me, too, and boy was I proud of my first rolled hem 😉 Have a nice weekend! Khendra
LikeLiked by 1 person
You are not alone, Khendra! I am delighted to hear you are friends now… and I share your sense of pride in having managed to get this sucker sorted out. Recently one of my friends, who I think of as a very good sewer–probably a better sewer than I am (not that it’s a competition) realised I had figured out the roll hemmer, and I could see she was really impressed… seems like there are quite a few of us struggling to make it work really well. Happy weekend to you too!
LikeLike
Ah, I can picture you in the boys queue at the machine lab! You must be proud that you didn’t let the pressure scare you off those classes 🙂
I also had a try at soldering (circuits) recently and it was fun, although certainly not easy.
Well done for mastering the roll hemmer!
LikeLiked by 1 person
Great instructions. Now I wonder if my machine has such a thing….Unfortunately I was still forced into Home Ec…making aprons and learning to cook stuff that made my mother shudder in revulsion.
LikeLiked by 1 person
Such beautiful hemming!
I have had some successes and some failures with this beast.
I do have a couple of ripped sheets which I put aside for dyeing. Maybe I should reapproach the roll hemmer…hmmm 🙂
xo Jazzy Jack
LikeLiked by 1 person
Thanks for the encouragement. I made my last lot of hankies from my collection of Can-teen scarfs which i never really used. Sadly I didn’t have a roll hem foot so the hems are a bit clunky. BTW I still recall the agony of trying to van dyke tomatoes. I was at an all girls school so there was no escape to the tech class for us!
LikeLiked by 1 person
Well–I think hems come in a lot of different forms and they don’t all have to be narrow! That’s a good use for those scarves. I have taken to donating if I want to, but not taking the scarf (and not taking plastic stuff if it’s a different charity). And ohhh… sorry you had no choice. I am not sure why van dyked fruit was such a big thing… I guess it was cheaper than teaching us how to cook dinner!
LikeLiked by 1 person