Monthly Archives: April 2018

Rinse and repeat

If these socks look familiar, its because a beloved friend brought me two skeins of lovely wool naturally dyed by Aurinkokehra. I knit a pair of socks from the first skein not so long ago and in the end, could not resist knitting another.  I’ve repeated the calf shaping, reinforcing stitches,  and the cotton and silk reinforcing thread.  The result is equally delightful.  There is something about yarn that changes colour as you knit that I really enjoy.  Such a well chosen gift for me!  These socks contain no nylon and no superwash–so I guess that they might be #tuffsocksnaturally but the yarn is certainly not my handspun.

IMAG6383

3 Comments

Filed under Knitting, Natural dyeing

PS: More on mending

IMAG6483

Just as I felt the mending was done, I found two–two!  Holes had worn through in my pyjamas.  The fabric is so thin.  I decided a big patch and a lot of machine stitching was the solution this time.  Here it is on the inside (below).  The patch was just a scrap left over from cutting something else out and I decided it was fine as it was.  Making it a rectangle didn’t seem likely to improve it.

IMAG6477

Then I realised how many patches there already were. At least three–with some pictures from the inside and some from the outside below. Some of these look just like scribbling to me.

And that same day, I mended the stiffening rectangle at the bottom of a shopping bag… and my beloved handed over some ripped jeans for repair!

7 Comments

Filed under Sewing

Mending the mending

Recently the pile of mending on my mind reached a point where it became the weekend’s project. But–I realised that there was only one thing I was mending for the first time.  I’ve reached the mending on mending stage.  This knitting bag has been waiting for a few more stitches into the base–the fabric the base is made from has just worn through over time.  But I don’t want to let the bag go.  It was made by one dear friend and embroidered by another and it was a birthday gift from years back.  It’s a treasure.  This time I fully embraced the idea of stitching the outer and lining together because I think this bag is at a stage in life where more mending is inevitable and not too far away.

Then there was the raincoat.  This op-shop find has had years of living on my office door for emergency wear because it is shower proof and has a zip-out wool lining. It’s a high quality garment!  If I am caught by wind or rain on my way home, I can grab it and run for the bus. It had this sophisticated arrangement for hanging on a hook (and I do hang it on a hook) and it has been broken for quite a while.

IMAG6437

This week I was caught by sudden wind and rain and wore it home.  The hanging arrangement is now stitched back with waxed linen thread.

IMAG6438

And I did some mends to the wool lining.  Yes, visible mending it is. Check out the fringe on the wool liner!

IMAG6458

My leafy linen bag, patched together from offcuts of my earliest eco-printing experiments on recycled linen shirts had worn through in several places again. Here it is  in use in 2014 and being mended in 2014.  The fading shows. Could I bear to let it go?  Not yet.  The new patches are all from one piece of dyed cloth that took up a lot of yellows.

Then there was the mighty flourbag shirt, which was mightily mended in 2015.  The patches on the inside fronts had not been stitched to the seams in every single place, and now there are holes right where I missed that rather crucial step in mending a garment that has been worn this much.  here are some of the holes and frayed parts…

And here are the mends seen from the inside and outside:

Sometimes when I mend people post asking why I bother.  Which is a decent question.  In a case like this raggedy shirt I think the only explanation can be that I love this shirt so much I don’t want to give it up.  Even though I wear it for gardening and such (let me be clear, I love having time in the garden).  the fact that I made it is part of it, but I make other things that I don’t love this way.  I love the feel of the calico and I have come to enjoy patching it up.  There are more places that have worn through where I am not going to bother at this stage–like where some layers of the collar have worn away but there are others still holding together.

And speaking of gardening, here are my gardening jeans.  Another case of thinking you have patched out to where there is some fabric with integrity and finding that a hole wears through just beyond the patch.  Never mind, just add on!  These jeans are comfortable for grubbing around in, and although I have another pair that are beyond use in polite company, they are made from poor quality denim that won’t bear a whole lot of mending.  They had a twin pair and I tried–but sometimes I can’t mend something back to wearable.  How do you decide when to mend your mending and when to let it go?

9 Comments

Filed under Sewing

Plant dyed silk stitching threads

A little while back, I decanted some silk stitching thread that had been steeping in dye for a year or two or three–using India Flint’s Stuff, Steep and Store preservation dyeing method.

IMAG6440

  1. hibiscus flowers
  2. daylilies
  3. woad seeds (mature and immature)
  4. unidentified wattle seed pods from the tram line
  5. dried coreopsis flowers, citrus peel water
  6. avocado peel (fresh), bicarbonate of soda
  7. mock orange leaves (Murraya paniculata)

IMAG6447

These jars have been sitting out in the rain and the sun, and I’m rather impressed by how well pencil on cardboard has lasted, never mention how the woad dyed wool, eucalyptus dyed yarn and handmade leaf string typing label to jar lasted.  I have already begun applying thread to some of those little jobs that just need doing…

IMAG6443

5 Comments

Filed under Natural dyeing, Sewing

Of Aprons and Alchemy

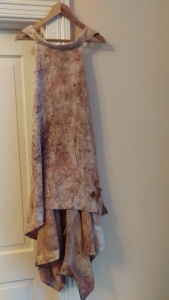
Some years ago, I made an apron at an India Flint workshop.  It’s an ingenious design India has created which starts with a shirt with a collar and ends with a coverall with straps that cross over at the back.  This model also has some stitched-on panels creating a generous length at the back.

IMAG6331

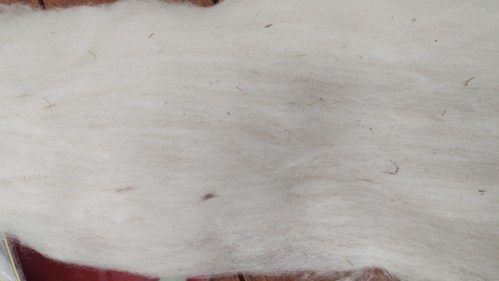
I brought this garment home to dye it, and it would be fair to say that I never loved the outcome (friends who were consulted recently liked it more than I did).  And, it had some large holes for which I was responsible and which I had a lot of [bad] feelings about having created.  In short, this garment has been in the naughty corner (the place garments go to wait when I have been naughty) for some extended time.  But then, India put up an online course called The Alchemist’s Apron.   It is further supported by an online community of eager stitchers and dyers from all round the world on facebook.  I was lucky enough to be gifted an enrolment (Thank you India!)–and this turned out to be the trigger for getting the apron out of the naughty corner and into my hands again.

IMAG6322

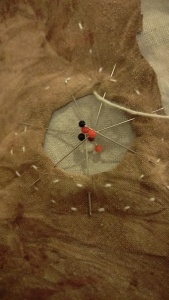
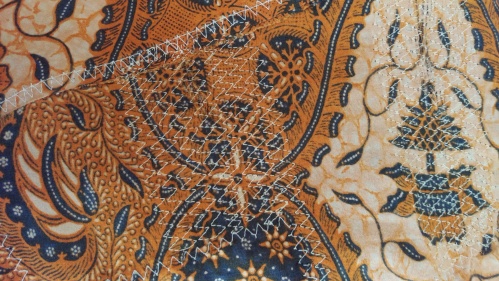
First step, give it a wash and soften it up a bit (soy mordant no doubt was responsible for starching it a little).  Second step, mending. Mending is an evening occupation for me, thus the mood lighting… I have learned some things about mending since these holes appeared and decided to use several different strategies.

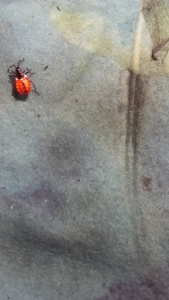
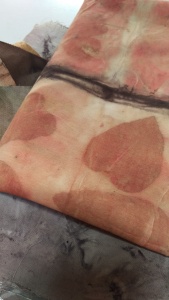
Some mends went over the hem (they were the most discouraging). These round-ish mends I especially like.

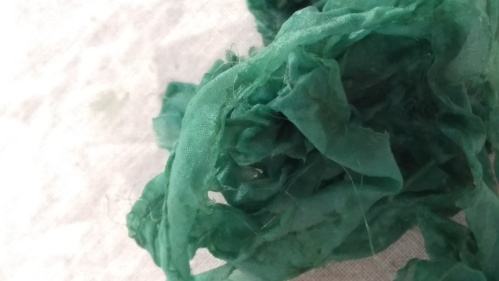
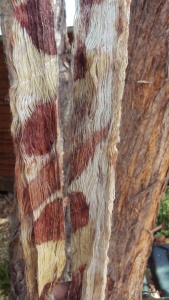
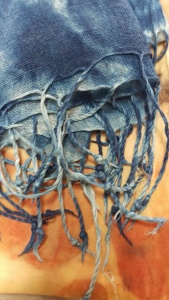
Once that was done, a second pass through the soy mordanting process, a wander around my neighbourhood by bicycle collecting leaves, and a bundle up with home made string (hems and seams left from cutting up and recycling clothing, in this case).

IMAG6359

I do love eucalyptus.

IMAG6361

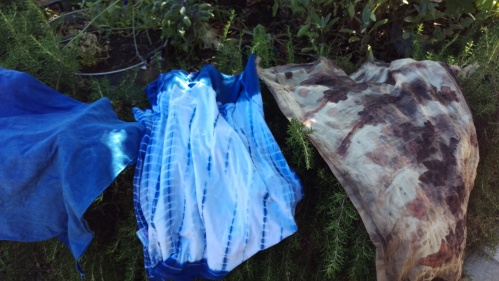
The mends still stand out but I think that is OK, because #visiblemending!  I had chosen linen patching and cotton thread, which did rather guarantee they would stand out as the patches are mostly in the added border at the back of the apron which is cut from a recycled op shop raw silk pant suit a friend gave me.

IMAG6389

I like the new apron much more!

IMAG6385

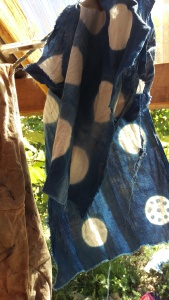
And here is the back view… with the button placket still sporting buttons.  It’s a bit glorious now, I think. Do you have things waiting in the naughty corner?  How do they get there, and more importantly, what motivates you to get them out again?

IMAG6386

14 Comments

Filed under Natural dyeing, Sewing

Dyeing weekend at home

Over a recent long weekend, I managed to do quite a lot of dyeing and some fibre processing. There was mordanting of cellulose fabrics with soybeans.

IMAG6351

I finally decided to stop worrying about the fact that my walnuts (gathered from under trees at my workplace) were whole and having dried, I was not going to be able to separate husk from nut (where no rat had done this for me).  I just soaked them whole and then dyed with them.

IMAG6364

I clamped and dyed.  This eucalyptus print + walnut bath made me happy!  Here it is still wet (you can see it still clamped above if you look closely).

IMAG6367

I flick carded Suffolk locks.  Some had staining–see that yellow streak?  I just decided I wasn’t prepared to waste indigo on vegetable matter and contaminate my vat.  And the Suffolk is so felting resistant I thought it would be fine flicked first and dyed after 9and it was).

IMAG6350

I used some of Tarla Elward’s wonderful Australian grown Indigo for the first time and used henna as the source of antioxidants, following Michel Garcia’s method.

IMAG6349

I’d been concerned about how to grind up the block indigo but I had found a mortar and pestle since dye camp and put it to use. So much fun, Such a great weekend.

IMAG6346

I am just delighted with the indigo colours on this wool, and even more delighted that I managed to revive my indigo vat, last used before dye camp a few months ago.  Clearly, I learned something from the wonderful Jenai at dye camp.  Indigo achievement unlocked!  Blue socks one step closer.

IMAG6357

7 Comments

Filed under Fibre preparation, Natural dyeing

Preparing Suffolk Fibre for Tuff Sock Spinning

Dear readers, here is a trick question.  What colour is this sheep fleece?  IMAG5891

The correct answer is ‘white’! And here is one big part of the explanation for its colour in the image above: the dirt that fell out of the fleece in the time it was on this sheet being skirted.

IMAG5886

The really long locks in this fleece are about 9 cm long.

IMAG5889

Or–not a lot more than 3 inches long.  The short locks are 3 cm long.

IMAG5887

You can see this sheep had been living in the bush and in the world, and not in a shed or on a grassy patch of green loveliness!

IMAG5231

I believe this picture shows some of the fleece after washing.  I know, right?

IMAG5898

Next step, flicking the locks.  There was no sign of felting, but there is nothing all that romantic about vegetable matter, seeds and remaining soil.

IMAG5895

Flicking open the locks does help immensely with all those things, though as you can see below, all that followed by drum carding does not actually remove all the vegetable matter. This is the first pass on the drum carder, with a bit more detritus falling out on the second pass.

IMAG5232

Needless to say–even more falls out onto my apron as I spin this springy, bouncy fleece.

IMG_20170911_174957_237

7 Comments

Filed under Fibre preparation, Spinning

Summer Dye Camp at Beautiful Silks

It seems so long since I went to Beautiful Silks in Allansford for Summer Dye Camp and yet–no post.  The tutor once again was Jenai Hooke, full of expertise and inspiration, and dye camp was wonderful!

IMAG5994

We dyed with fresh woad from the garden and ice.

2018-01-23 12.08.55

My fellow dyers did all kinds of amazing things with indigo and leaves. The crowd at Beautiful Silks never fails to be full of inspiring and interesting humans.

2018-01-23 14.43.49

Critters dropped in!

IMAG5997

This is a strategy for dyeing yarn that would never have occurred to me.  Stunning in the skein (and all multi coloured skeins have their challenges).

IMAG6017

I dyed with indigo and with eucalypts.

IMAG6009

I learned a new-to-me and very effective way of mordanting with soy, and was re-educated about the importance of scouring.

IMAG6006

I made indigo circles for later use, inspired by Jude Hill’s indigo moons on Spirit Cloth.

There was so much more!  Madder, cochineal, walnut, tannins, mud, indigo painting… what a fabulous way to spend a holiday, plus the glorious time spent in Warrnambool and surrounds.  Highly recommended.

4 Comments

Filed under Natural dyeing