Tag Archives: #Menditmay

More autumn guerilla planting

I started the day with a run, and on the way home picked up a plastic bag. A charity has delivered them all round the neighbourhood, requesting they be filled with second hand clothing. Many have made their way onto the street empty, however–so I stopped this one going down a drain and half filled it with rubbish in only a few blocks. I know litter picking isn’t romantic, but I hate all the rubbish and it does give me satisfaction to remove some of it. A certain would-be politician who is spending some of his many millions trying to buy his way into office is currently contributing more handbills than he should to the litter stream (we are a week out from a federal election). But also lots of straws, single use cups and lids, free newspapers in their horrible plastic bags, and bottle caps.

Far better than litter picking is planting though! This time, prostrate wattles, Indigofera Australis, scrambling saltbush and a silver leafed saltbush.

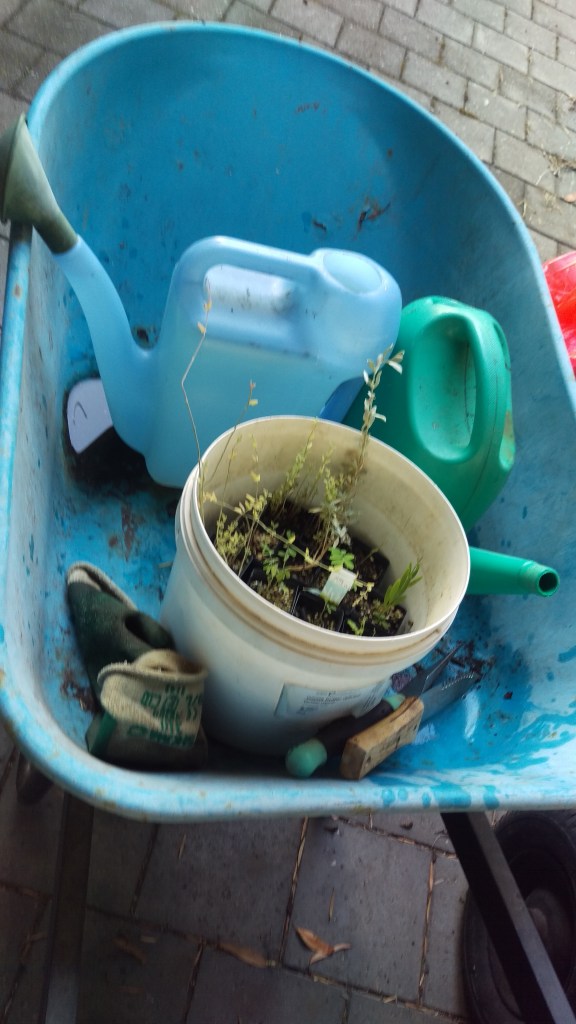
Out into the street (in a hurry I guess, the photo is all wobbly!)

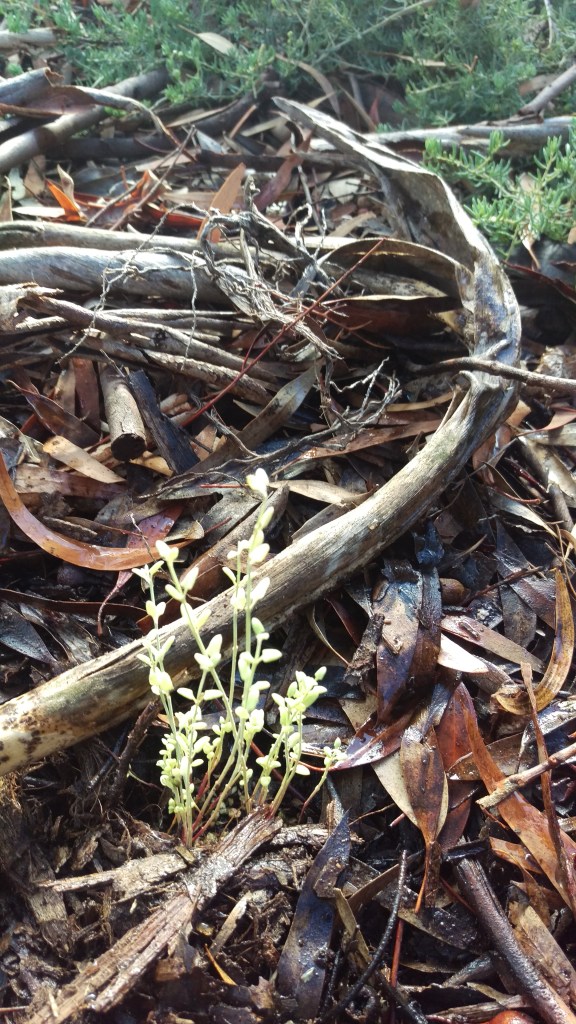
Some became understorey in an area where almost all the Department of Public Transport and Infrastructure plantings died. Others I planted in an area where council has installed a watering system, and recent works on the gas main in our street resulted in loss of more plants…

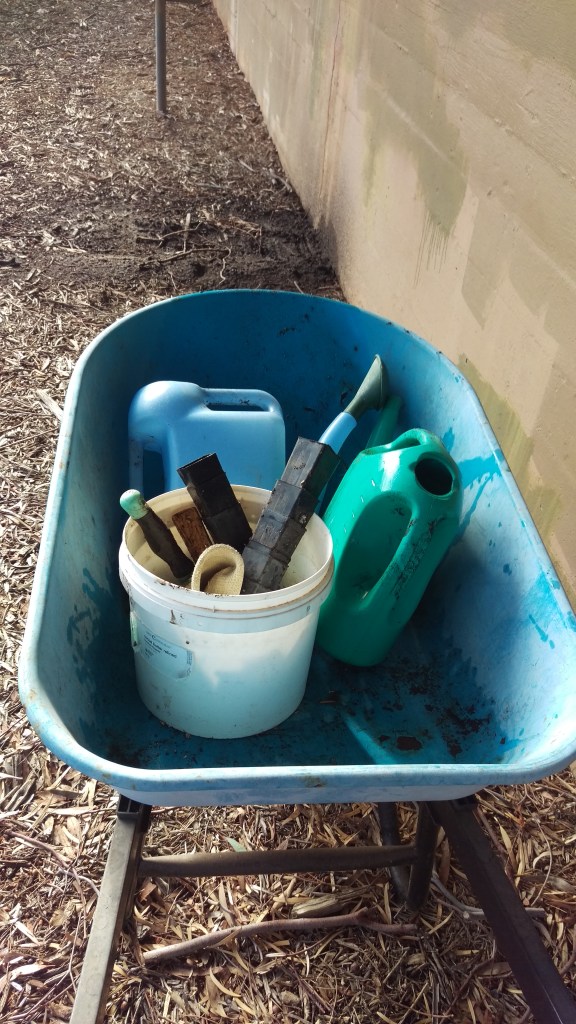
I picked up some more rubbish! And then home again. On my way home a chap asked me whether I was in training for some kind of event. What kind of event???!! I couldn’t help wondering, but I think he was just nonplussed by my hauling a wheelbarrow around the place, so I didn’t ask.

I just want to brag for a moment. My beloved discovered during the first rains that the transparent panel in our garden shed roof is now full of holes. I suspect the fact it is on the possum super highway through our backyard at night has hastened the holes. Well. I replaced it all by myself (with a drill bit from a friend and some help from someone with a bigger car getting the new panel home). So here you have the view of the broken panel from the ladder; the view of my neighbour’s bamboo patch from inside the shed with the panel removed; and the ladder view of the finished job. Far from perfect but perfectly functional. I feel proud! I even texted my Dad to tell him since he has taught me a lot and surely was responsible for the gift of that power drill in the first image in the 1990s, bless him.

5 Comments

Filed under Eucalypts, Neighbourhood pleasures

#MenditMay: Beyond darning

I have a dear friend whose entire family are facing some very tough times.  I’d been wondering what I could do that might bring some comfort to her, and then I had an idea.  I knew she had a cardigan that had belonged to someone she treasured, and that it was showing signs of long wear and lots of love.  So I offered to mend it for her.  She chose some yarn and on some quiet nights last week I set to work.

IMAG1584

Darning is always possible, but sometimes it seems barely adequate to the task, and the result is unlikely to be pleasing.  I have darned holes bigger than this, but I did cover some of them with leather elbow patches afterward!

IMAG1586

In the end I decided knitting in patches was a better idea.  I used needle and yarn to stabilise runaway live stitches.  Then I picked up some stitches, as you can see above.

IMAG1590

In a couple of spots I darned first and then picked up stitches.  See the woven section above the knitting needle?  Then it is really a process of knitting along and purling back, knitting two together at each side with a patch-stitch and a picked up strand from the garment.  There were some places where I added extra stitches or cast some off as I passed.

IMAG1588

One sleeve got several patches.  I tried different ways of casting off (binding off) and decided hand sewing the stitches down was the smoothest finish.

IMAG1602

There were smaller places where I did small darns or just trapped live stitches so that ladders could not spread further.

IMAG1592

On the cuffs, I considered a few options before settling on using some of the silk thread I dyed with Japanese indigo.  The grey was pretty much perfect here and I was able to use a fine enough needle to stop the stitches that are unravelling going further.

IMAG1594

There were four buttonholes but one button.  I couldn’t match it, so I sewed on four that have come off some other garment.

IMAG1598

Because a cardigan can be worn open, I concealed the ends of the stitching, with the initial knot and the tie off under the button rather than on the ‘wrong’ side, where I would happily tie them off on a shirt.

IMAG1599

And here it is.  Visibly mended but in a way I hope will mean this treasured cardigan will have an extended life providing comfort and warmth to my friend through times good and bad.

IMAG1601

I know my friend is surrounded by the love and care of many friends and her family too.  I’m lucky to be among them.

IMAG1600


18 Comments

Filed under Knitting, Sewing

#MenditMay Mending sewing machines and more

2016-05-14 15.28.54

This sewing machine was found in a shed.  It was unwanted by the new resident, so it came to me for cleaning, oiling and a look over.  You see it here with some of the upper casing removed to allow lubrication. It is now on its way to new users in the Anangu Pitjantjatjara Yangkunytjatjara lands. Meanwhile at our place, the threadbare flourbag shirt got some more patches added.  Here, the glue stitching I mentioned in my last post holding them in position.

2016-05-14 11.26.19

Here, the inside view.

2016-05-14 11.32.17

And here, the finished–for now–view of the back.

IMAG1604

Threads dyed with pansy, dyer’s chamomile and eucalyptus.

IMAG1605

I took up my friend’s jeans.  I feel like I have almost got top stitching denim sorted!

2016-05-14 17.41.39

Top tips: use a jeans needle.  If using top stitching thread, thread the needle by hand (should you have any other options, don’t use them); and leave ordinary thread in the bobbin. Use a 4mm stitch at least.

2016-05-12 11.27.07

Buttons replaced in position and stitched down so they don’t get away. I had to laugh when one button fell off at work the day of the second mending workshop!

2016-04-26 19.46.29

And another sewing machine cleaned, oiled, tested and ready to go to its new owners.  My grandmother lived in a country town where getting your machine serviced was not easy to arrange (cost may have been an issue too).  She was a fearless tender to her own machine and those of all her friends and told me many times that cleaning and oiling fixed most troubles.  So I am in her footsteps here, but in this case with a manual to guide me.  I took this machine apart and oiled all. the. places.  It really whirs along! It is now headed to asylum seekers who have been released from increasingly notorious conditions in detention on Nauru, who were tailors in their country of origin and will make great use of this well maintained machine.  It came to me because I was working on the mending kits and a lovely volunteer in an op shop asked if I could re-home a machine she knew needed to find a new home. I feel sure its new use would please the original owner very much.

8 Comments

Filed under Natural dyeing, Sewing

#MenditMay: Mending fine machine knit clothing

More and more contemporary clothing is knit in a very fine gauge by a machine. It is entirely possible to darn it by hand as you might a hand knit, but it is very difficult to match the gauge of the original fabric. I sometimes darn with embroidery thread, using a single strand.  Sometimes I darn with machine sewing thread. In each case, the garment might be made of one fibre while the thread is made of another–but at least the darn will be less obtrusive if that is your goal, and the hole will not continue to grow larger as the knit fabric unravels.

2016-05-12 20.39.30

I recently snagged this fine cotton cardigan on a protruding nail.  Ouch!  I decided against darning it and chose to patch my torn sleeve.  This is a method I have been using a lot for threadbare sections or places where holes are small (and sometimes where there is more than one).  It will also work for larger holes and you can choose a matching patch or a decorative contrast as you see fit.  I like to make a patch that is larger than the hole.  There will be no puckers around the damaged section and any stresses placed on the mend will be distributed more widely. So here is the hole and the patch I selected (cut from a t shirt in the rag bag at our local Sustainability Centre). This method will make the patched area stretch less (or become incapable of stretching), and this has to be considered when deciding whether to use it.

2016-05-12 20.41.08
I begin by tacking the patch into position on the inside of the garment, checking carefully each time I change direction to make sure that I am not pulling the patch so it cannot lie flat.  I use a running stitch, taking a tiny stitch on the outside and a longer stitch on the inside.  I learned this approach from Jude Hill, a textile artist who uses it to hold layers of quilt fabric together.  She calls it the glue stitch: and has a tutorial you might enjoy here.  I have just adapted it to mending. Jude Hill’s work revealed to me that I had not been able to escape learning running stitch as involving stitches which are all of equal length.  As soon as I had that thought (with her help), so many things opened up! It’s important to make sure all the edges of the tear are stabilised, and that the edges of the patch are stabilised too.  I tend to then create a network of stitching so that the patch is stitched on to the outer fabric all over its surface.

2016-05-12 21.17.37

Pretty soon, there is your hole, mended.  If all the cloth is still there, you can stitch the torn section down over the patch, as I have here, and have almost none of the patch fabric on show.  I am sure this is visible mending, but it isn’t mending that draws the eye.  Perfect for this garment.  Happy mending!

3 Comments

Filed under Sewing

#MenditMay: Loving up a lining

2016-05-05 13.12.37

My generous friend India Flint gave me this coat. I would never have chosen it for myself, and if I had been the one to find it second hand, I would have been too scared to throw it in a dye pot.  India suffers from no such shyness (and there are good reasons for her confidence, of course!)  I love it.  It is a gorgeous fabric with wool content but cashmere too, and the edges have been picked out in a fine, shiny thread, by hand.

2016-05-05 13.13.08

I think India sewed a new button on, or moved the old one.  The thread looks like it met Eucalyptus at some stage, and is in two subtly different colours.  The coat is lined with silk.  It is like wearing a big snuggly hug.  I find I take it out when the day holds particular challenges, even on days when it might not be cold enough to wear it, because it has comfort factor. I took it on a very challenging hospital visit last year even though I never put it on!  I patted it on the long trip out and home again.

2016-05-05 13.12.53

The back has a wonderful set of resist marks from a nice rich dye pot.  In short, this coat is a treasure.  A treasure with  a history in which it has been loved and worn by other people, found by India in a suitably romantic location in the US, dyed and then gifted on to me!  And now, it needs a little love from me.

2016-05-05 13.13.26

The lining is coming away below the neck line.  Those two peaks are an interesting detail at the inside centre back.

2016-05-05 13.13.32

Clearly the armscyes were the most vulnerable place in the lining.  They  have been restitched by hand, in several different threads.

2016-05-05 13.13.48

This one has a thicker thread and a different, bolder stitching strategy.

2016-05-05 13.14.34

And, there is a label explaining that the garment has been made under fair labor standards.  I wondered whether this was a reference to union labor, or something else.  It took a little google-fu but in the end it turned out that this is a union label from the National Recovery Board for Coats and Suits, used 1938 to 1964.  This coat was made before I was born! According to my online source, ‘The National Labor Relations Act encouraged growth in stateside unions to create more jobs during the economic crisis of the ’30s. The Coat & Suit Industry union was born out of FDR’s New Deal Coalition.’ This label was used by the International Ladies’ Garment Workers’ Union and there is a wonderful online history which details some of their labels as well as so much more.

2016-05-12 10.45.23

And so, to mending it back into good shape so that it can go on keeping me warm and being its lovely, touchable and glorious self.


18 Comments

Filed under Natural dyeing, Sewing

#MenditMay Mending workshop

Just Mend It - jpeg

Last night the second mending workshop went off at our local hub, The Joinery, supported by the Adelaide and Mount Lofty ranges Natural Resources Management Board. Diane from the Adelaide Sustainability Centre did a wonderful job of organising.  She has more events coming up!

2016-05-11 19.39.16

The first workshop was a cosy, small affair with two mother/daughter teams who worked on learning to darn, mending torn jeans and hemming some pants.  It was just delightful to watch their mutual support and love for each other as well as their mending skills.

2016-05-11 19.18.44

The second workshop brought in quite a crowd of lovely people and loads of garments in need of buttons, hems, patching, darning, seam repairs, zippers, and repairs on rips. There was a lovely warm atmosphere as we set to work repairing the efforts of moth larvae and the impact of hard work and long wear on clothes that are practical, treasured or simply available to be practiced on.

2016-05-11 19.43.15

The mending kits went to happy new homes.  It was wonderful to see those needle cases opened out and people figuring out which needle to use for which job.  I got to share the joy of ‘magic eye’ or ‘self threading’ needles with people whose eyesight isn’t up to needle threading for the moment. Several people worked on their jeans and one generous reader was working on her daughter’s partner’s jeans.

2016-05-11 19.44.36

There were patches plain and fancy (this one has a decorative silky top layer and some denim patching underneath doing the heavy work). Some people were working on their very first mends but several had aspirations to make their own clothes.

2016-05-11 19.49.41

One lucky person had been to a workshop with India Flint and was wearing some beautiful plant dyed clothes she had made, while she had others well-worn and ready for repair.

2016-05-11 19.48.35

There were some much-loved garments in for mending.  It was a real pleasure to be in the company of other people who like to make things last!  There were some strategy conversations about how to make special things go further.

2016-05-11 19.53.02

There was fancy mending too.  Here, a patch from a worn out black t shirt has gone on the inside of a merino top, with some decorative stitching holding the layers together.  No one will ever recognise this as mending… and I think there will be more spirals to address other places where wear and moth larvae have done their work.

2016-05-11 19.53.20

Here, some great pants from the op shop are being taken up by a new wearer who is not the same height as the previous owner.

2016-05-11 19.55.27

People learned darning, decorative patching, patching that won’t show so much and how to wax thread.  It turns out I know a simpler way to replace a button than some folk had figured out for themselves, and there were people sewing buttons onto leather as well as people sewing statement contrast buttons on with alacrity.  Some of my friends came along.  And, I got to meet some lovely blog readers for the first time! Thanks so much to everyone who came and made it a great night.  If you’re looking for guidance, please do go to my directory of mending tutorials.  Happy mending!

10 Comments

Filed under Craftivism, Sewing

#MenditMay: Replacing a jeans zipper

2016-05-05 13.16.37

So I have this pair of jeans.  I made them myself.  They have some fine features, such as flour bag pocket interiors and contrast pocket inserts (with leaves on them!) and a beautiful button.  They have their flaws, one of which is that even though I pre-shrunk the fabric, they shrank more after I made them.  But currently the defect that means they do not get worn is the fact that the zipper will not stay up.

2016-05-05 13.23.43

It only took ten minutes to rip the zipper out.  My mother used to call her seam ripper a ‘quickunpick’.  I think it might have been a brand reference that no longer has currency.  But it’s accurate!  All seams involving the zipper ripped out, top stitching out to release the fly facing, bar tacks out, the waistband ripped out to release the zipper and create some room for manoevre when the new one goes in.  I selected a zipper from the stash, a vintage blue zipper much longer than the one I removed.  It doesn’t matter, because you can just stitch to create a new zipper stop and then cut the unwanted zipper tape and teeth off (provided they are plastic and not metal–ouch). Next step: put a stout needle into your machine, preferably a jeans needle.  I forgot, and snapped the needle I had been using for finer fabrics part way through this process. A zipper foot will make this easier but is not essential.

2016-05-05 14.42.05

The first step is to stitch the zipper face down onto the fly facing but not the jeans front.  The fly facing is attached to the front opening.  You need to stitch the zipper to the facing and NOT to the jeans front.  Here you can see I have pinned the zipper in position: tacking first is another option.  I have chosen my stitching line using the marks left from the previous stitches.

2016-05-05 14.52.16

Here, you see that seam and the new zipper stop stitched across the end of the zipper!

2016-05-05 14.57.08

The next step is to sew the zipper to the other side of the pants opening, with the fly shield (a whole separate piece of fabric that sits between the zipper and your body) pinned out of the way.  Check that everything lies flat before you stitch.  A zipper foot is your friend, if you are equipped with one!

2016-05-05 15.19.09

Once that’s done, you can align the fly shield, pin or tack it in position and stitch over that seam again with the fly shield included in the seam.  In the picture above, both steps are complete, and you can see the fly shield extending past the left half of the zipper towards centre front and the zipper stitched to the fly facing on the right.  I have tucked the ends of the zipper and the raw edges of the jeans fronts up into the waistband and re stitched them too.

2016-05-05 15.23.49

Now it is time to get that fly shield out of the way and top stitch that line you can see to the right of the foot in the image above.  I followed the previous stitching line this time, but usually I draw the curve on a sticker, cut it out and stick it in position, then top stitch with the zipper foot just outside the edge, a trick from a pattern or book I have used at some stage.  Finally, flip the fly shield into the position it would be in when the jeans are in use, and bar tack at the base of the zipper near the mid seam and then over on the right to hold the fly shield in place in its intended final position.  If in doubt, consult a commercial pair of jeans and decide where to bar tack. When I say ‘bar tack’, I do what I’d do if I was sewing on a button with the machine,  zig zag on the spot a few stitches.

2016-05-05 16.10.55

Yeah, I know.  They look just the same.  But now the zip will stay up, and both of us know this is a big difference! What are you doing in #MenditMay?


10 Comments

Filed under Sewing